Eclipse Helios is a next regular update to all known and loved IDE for us, which contains a huge number of innovations and improvements. Earlier I have already written about how to integrate previous version of Eclipse Galileo with PDT + Smarty. I’m pleased that the materials of the publication were useful for lots of people because I received numerous “Thanks” in anonymous form. In fact, there is no problem with integration in new Eclipse Helios because it contains the new PDT 2.2.x and the DLTK 2.x plug-ins that are necessary for the functioning SmartyPDT.
Therefore, I recommend every one to upgrade on Eclipse Helios, and if you want to integrate the PDT + Smarty, then read below… 🙂
As always, all the examples I make for Mac OS X, but that does not stop you from using those materials for another operating system. The only thing that will be different is a build of Eclipse Helios for your operating system. Well then, let’s work!
- Download Eclipse for PHP Developers from the download page. I will take it as an example of this operating system (Mac OS Snow Leopard 10.6.4 64bit) but you choose Eclipse for yours operating system.
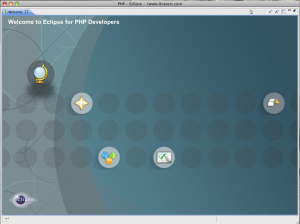
- Unpack the downloaded archive. In my case, this is “Eclipse-php-helios-SR1-macosx-cocoa-x86_64.tar.gz”. In the unpacked folder run Eclipse, further specify the folder where you will store your projects and configurations for plugins from Eclipse. If everything is done correctly, you should see a welcome page.:
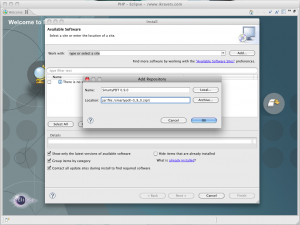
- Installation of SmartyPDT. Download the plugin from http://code.google.com/p/smartypdt/. While I was writing this article the latest version was “Smartypdt-0_9_0.zip”. The next step is go to: Help → Install New Software → Add → Archive. Select the newly downloaded ZIP archive with SmartyPDT.
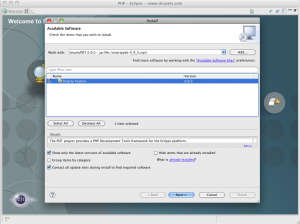
Then – “OK”. An important point! SmartyPDT goes as “Uncategorized” plugin. In this case you will not see it in plugins list. Therefore, uncheck the
“Group items by category”. Also, “Smarty Feature” should be checked.-
Then click on “Next” for the next two steps, and then “Agree” to the license text and “Finish”. After successful installation, Eclipse will ask us to reboot. Let him.
-
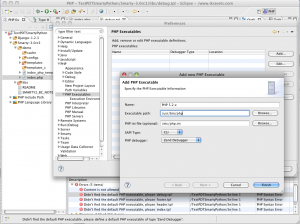
- Configure “PHP Executable”. If we don’t do it then we will receive this error in all Smarty templates: “Didn’t find the default PHP executable, please define a default PHP executable of type ‘Zend Debugger’. PHP Syntax Error”. Then open Eclipse → Preferences… → PHP → PHP Executables → Add…
- Name: PHP 5.2.x
- Executable path: specify the path to the executable PHP (for Windows – this php.exe)
- PHP ini file: the physical path to the php.ini file (you can leave it as empty)
- SAPI Type: CLI (if “php” is compiled with support of CLI or Windows OS is selected phpcli.exe), otherwise – CGI.
- PHP Debugger: Zend Debugger, or else, if you have it installed.
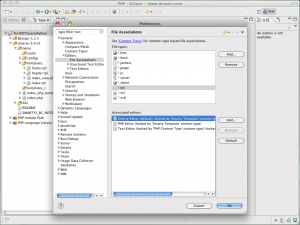
- Associate *.tpl files with SmartyPDT. Open “Eclipse → Preferences… → General → Editors → File Associations... Then we should add “File types:” *.tpl and associate it (Associated editors:) with Smarty Editor and set by Default. This will allow us to open all files *.tpl with Smarty Editor without using the “Open with …”.
- Add “Smarty” support for the project. The next step is to add SmartyPDT support for the selected project: right click on project → Configure → Add Smarty Support.
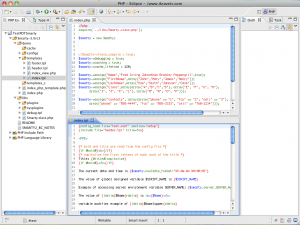
- The end. And now, the results of our work 🙂
P.S: The colour scheme for syntax highlighting may vary from that is shown in Fig. I just like this look, rather than “default” 🙂

